Virtual buttons and axes are defined per project, and can be edited under File > Project Settings... in the Controller section. Though Check Key can read keyboard inputs directly, it is a much better practice to define logical virtual buttons (e.g. “Jump”) and use those throughout your actions than to depend on specific keyboard keys. This makes changing the input scheme later trivial, allows controller support to be easily added, and supports key rebinding features.
Story Machine uses the following names for the parts of a gamepad:
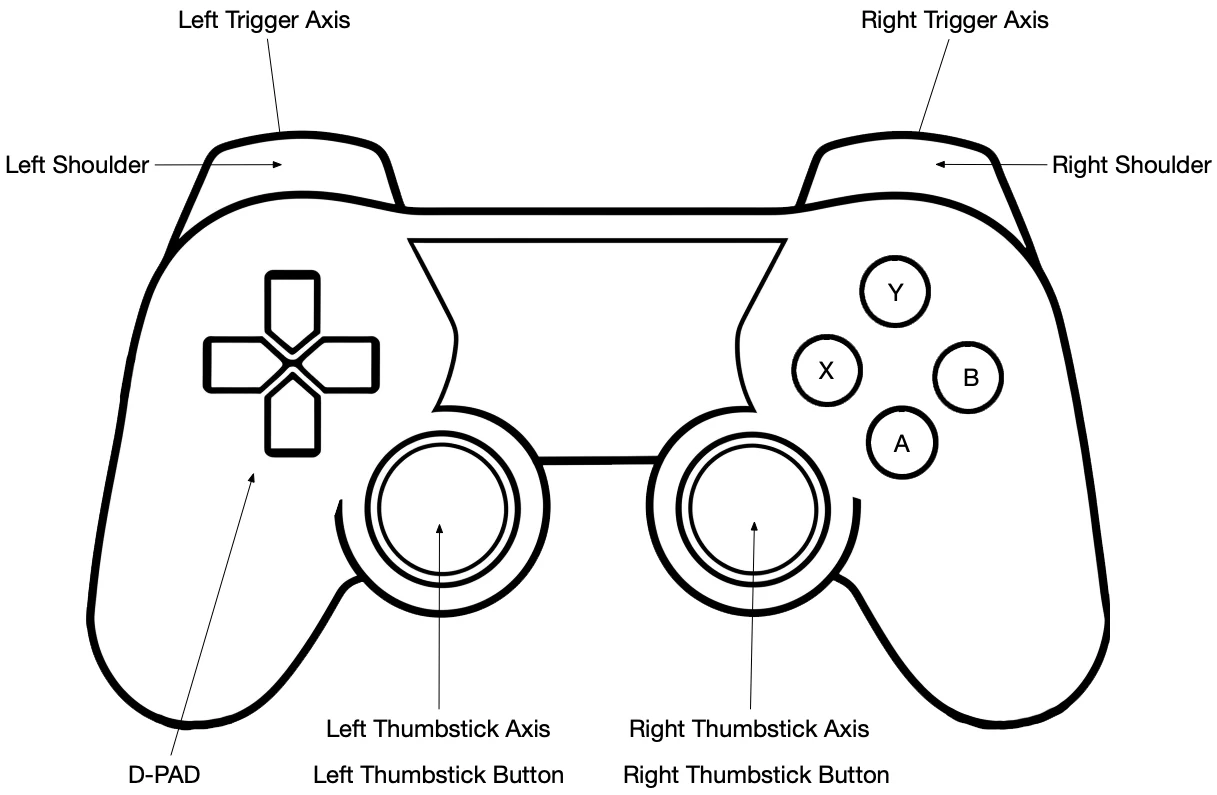
Virtual Buttons
A virtual button represents a button that can be pressed down or not. Any number of gamepad buttons, keyboard keys, and mouse buttons can be bound to a single button, so “Jump” can respond both to the space bar and the A button on a controller with a single virtual button.
Virtual buttons are read with the Check Key action, which can test whether one is pressed, triggered (pressed down this frame), or released since the last frame.
Virtual Axes
A virtual axis represents a one-dimensional analog input, such as a mouse, analog stick, or analog trigger. Virtual axes are one dimensional, so to support an analog stick or mouse, it is common to set up two: one for horizontal, and one for vertical. Analog sticks report input from -1.0 to 1.0, and triggers report the degree pressed, from 0.0 to 1.0.
Virtual axes can also support a “touch stick” input, which is a virtual thumbstick designed for touch screens.
Like virtual buttons, multiple hardware inputs can be bound to a single virtual axis. When this happens, the first input that reports movement is used.
Virtual axes are read with the Controller Axis action, which stores the current value in a variable.
Multiple Controllers
Story Machine supports up to four gamepads. Virtual buttons and axes are explicitly assigned to a controler, and Controller 1 is the default for single-player games. To support multiple controllers, add a new set of virtual buttons and axes for each controller.